Tutorial: Modifying the Markdown File
This tutorial will guide you step-by-step on how to modify and customize the Markdown file in this folder.
Instructions for Modifying the File
- Clone the repository
First, you need to clone the repository. Once cloned, you should see something like this: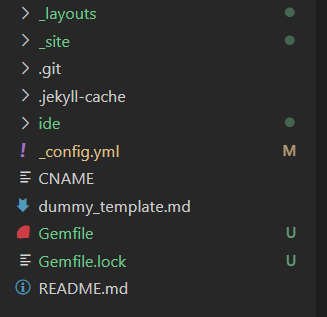
- Create a copy of the template
First, go to this path ide / tutorials / template.md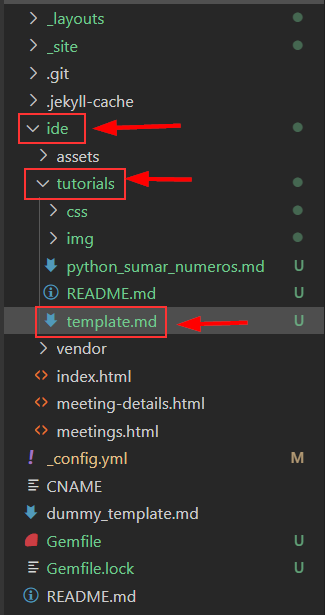
Then copy the template.md file into the same folder (tutorials) to modify it, and name it as you like.
- Front Matter
Update the values within the---lines.layout: Indicates the layout to be used. It should match the layout file you want to use.title: Change the title to one that clearly describes the content of the tutorial.
-
Tutorial Title
Modify# Tutorial Titleto reflect the main topic. - Image
- The line
<center><img src="img/your_image.jpg"...allows you to insert an image. - Update
srcto point to the correct image path. Changewidthandheightif you need to adjust the size.
- The line
- Table of Contents
- Add or remove sections according to what is actually in your file.
- Ensure each link (
[Introduction](#introduction)) matches the section headings.
- Example Section
- Each example has a title (
#### Example 1: Example title 1) and a code block. - Update the code block and the expected result (
> The output will be:) to be accurate.
- Each example has a title (
- Conclusion
- Summarize the key points of the tutorial here.
- References
- List any sources that are useful for further exploration of the topic.
This README should provide a clear guide for modifying the Markdown file and customizing the content in each section.